
Discord is a powerful platform for community building, allowing users to create servers that cater to their interests and hobbies. One of the key features that enhance server organization is the use of roles. Roles not only help manage permissions but also allow members to showcase their interests and status within the community. Common roles might include titles like “Gamer,” “Moderator,” or “Newbie.” Typically, only server admins and moderators can assign these roles, which can sometimes create bottlenecks in large communities.
Enabling self-assignable roles can make your Discord community more dynamic and engaging, allowing members to choose their own roles based on their preferences. While Discord does not offer a built-in feature for self-assigning roles, it can easily be achieved using bots. In this guide, we will show you how to set up self-assignable roles using the Dyno Bot, a popular choice for many Discord servers.

Choosing the Bot
When it comes to self-assignable roles, choosing the right bot is crucial. Although there are many bots available, not all are user-friendly or free. Some premium options can be complicated or expensive. After experimenting with several, we recommend Dyno Bot for its ease of use, robust features, and a user-friendly dashboard for configuration without relying heavily on commands.
Also Read: How to Add Bots to Your Discord Server
Self-Assign Roles Using Dyno Bot
Step 1: Add Roles to the Server
Before allowing users to assign their own roles, you need to create the roles they can choose from. Here’s how:
- Open the Discord app and navigate to Your Server.
- Click on Server Settings and then select Roles.
- Click on Create Role.
- Enter a name for the role and configure the necessary permissions.
- Click on Save Changes.
For example, if your server is tech-focused, you might want to add roles like “Android” and “iOS.”
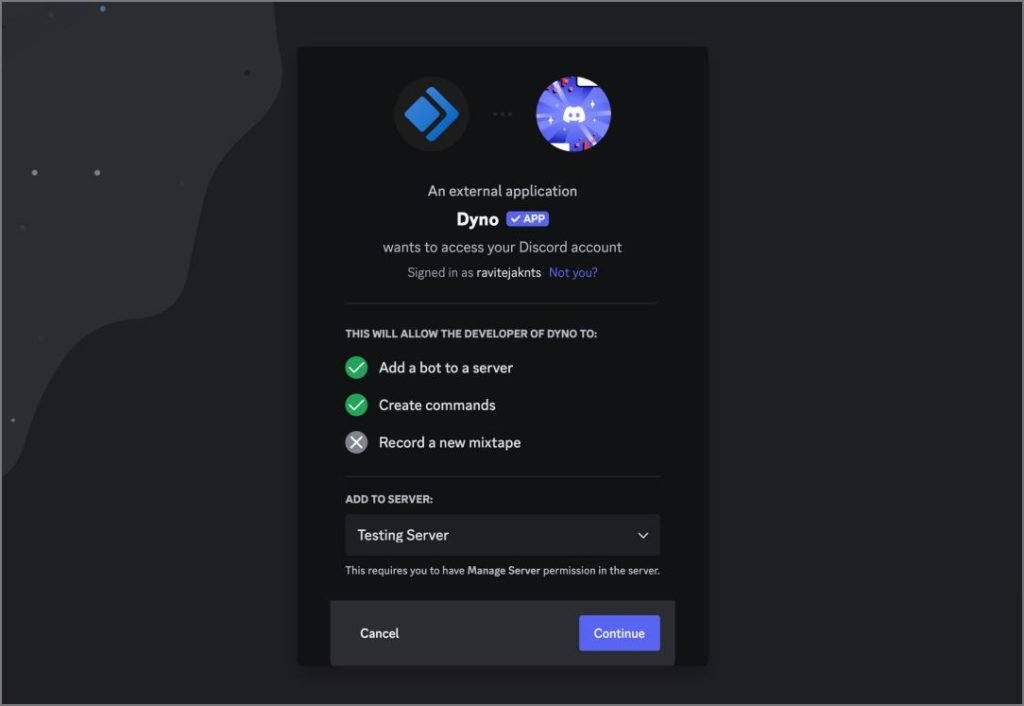
Step 2: Invite Dyno Bot
To set up Dyno Bot:
- Download Dyno Bot and invite it to your server.
- Click the Add App button and select your server.
- Grant the necessary permissions for Dyno Bot to operate.
Step 3: Give Authority to Dyno Bot
Dyno Bot needs the correct permissions to grant roles:
- Open Server Settings > Roles > Default Permissions.
- Move Dyno Bot above the roles it needs to assign (like Android and iOS).
Step 4: Set Up Reaction Roles Message
Now, you’ll create a message that users can interact with to select their roles:
- Open the Dyno dashboard and select Modules > Reaction Roles.
- Name your message and select the channel where it will be posted.
- Choose a message type: plain, embedded, or existing messages.
- Select how users will assign their roles:
- Reactions: Assign emojis to roles.
- Buttons: Create clickable buttons for roles.
- Dropdowns: Provide a dropdown list of roles.
- Enter your message text prompting users to select a role.
- Configure settings for reactions, buttons, or dropdowns, and click Save.
Once you’ve set this up, users can react with an emoji or click a button to assign themselves roles!

Step 5: Customize Reaction Roles
You can also customize how roles are assigned:
- In the Reaction Roles options, specify if users can select multiple roles.
- Decide if options should be shuffled each time.
- Set permissions for who can react.
After finalizing these settings, hit Save to send the message to Discord.

Akinator: A Simpler Alternative
If you’re looking for a simpler setup process for self-assignable roles, consider using Akinator. While primarily a game bot, Akinator also has a user-friendly reaction roles feature.
How to Set Up Akinator
- Install Akinator Bot on your Discord server.
- Type
/reaction rolesand select the Akinator option. - Enter your message, decide if users can select multiple roles, and add roles with labels for buttons (up to 10 buttons).
- Press Enter to send the message.
Users can easily click the buttons to add or remove their roles.

Conclusion
Setting up self-assignable roles in Discord can significantly enhance member engagement and streamline server management. By using Dyno Bot or Akinator, server admins can empower users to choose their roles, fostering a sense of ownership and community. This guide provides you with the steps to create a more dynamic and participatory environment on your Discord server.

Frequently Asked Questions
1. Can I use multiple bots for self-assignable roles?
Yes, you can use multiple bots, but it’s important to ensure they don’t conflict with each other’s commands and settings.
2. Do self-assignable roles affect server permissions?
No, self-assignable roles can be configured to have specific permissions, but users only change their roles without affecting overall server management.
3. Can I remove a self-assignable role later?
Absolutely! As an admin, you can modify or remove any role at any time, including self-assignable roles.
4. Are there any limits to how many roles users can choose?
This depends on the bot’s configuration. Some bots may allow users to select multiple roles, while others might limit them to one.
5. What if my bot stops working?
If a bot malfunctions, try re-inviting it or checking the bot’s status on its official site. If issues persist, consider switching to a different bot.